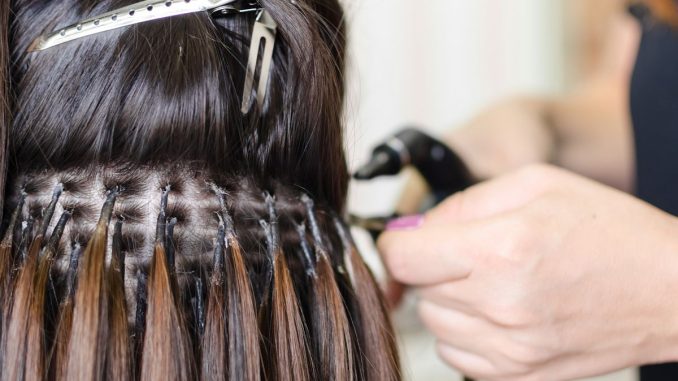
Micro-bead hair extensions, commonly called I-Tip hair extensions, are a popular option for people who want to lengthen and volumize their hair. They are a semi-permanent option because they require professional installation and, with good maintenance, can endure for several months.
I-Tip hair extensions have the advantage of being curled like natural hair, which opens up a variety of styling possibilities. We’ll go through how to curl I-Tip hair extensions in this article and offer some advice on how to get the best curls.
It’s crucial to understand before we get started that I-Tip hair extensions need to be handled gently, much like natural hair. As a result, you should refrain from applying too much heat because it could harm the extensions and reduce their lifespan.
It is advised to use a curling iron or wand with a low to medium heat setting and a heat protectant spray while curling I-Tip hair extensions to prevent damage.
Step 1: Brush your I-Tip Hair Extensions
Make sure your I-Tip hair extensions are tidy and tangle-free before starting to curl them. Starting at the ends and moving up to the roots, carefully brush your extensions with a soft bristle brush. This will make sure that your extensions are smooth and simple to work with by removing any knots or tangles.
Step 2: Part Your Hair
Section your hair after your extensions are brushed and tangle-free. Starting with a center part, divide your hair into sections from ear to ear. Focus on curling the bottom area of your hair initially while keeping the top section of your hair clipped up and out of the way. You may achieve a more natural look and keep the extensions from getting tangled by doing this.
Step 3: Set up Your Wand or Curling Iron
Make sure your curling iron or wand is heated to the appropriate temperature before beginning to curl your extensions. It is advised to use a moderate to medium heat setting when using I-Tip hair extensions because high heat can harm the extensions. Make sure your curling iron has a clamp if you’re using one because it will help keep your extensions in place while you curl them.
Step 4: Take a Little Part of Hair
It’s time to begin curling your extensions after your curling iron or wand is warm. The barrel of your curling iron or wand should be wrapped with a short portion of hair that is about an inch wide. After holding for a brief period, release the curl from the hair.
Step 4 and 5: Repeat for the Remaining Portions
Working your way around the bottom area of your hair, keep curling little strands of hair. Avoid curling the microbeads that hold the extensions to your natural hair while you work. Beads can be gently straightened out with your fingers if they accidently curl.
Step 6: Release the Top Section
Release the top piece of your hair after curling the bottom section, then do the same with the top section. Take care not to curl the microbeads as you divide your hair into small portions and curl them.
Step 7: Curl your hair
It’s time to style your curls once all of your extensions have been curled. To gently separate the curls and give your hair a more unruly, natural appearance, you can use a wide-toothed comb or your fingers. Use a small quantity of styling product, such as a curling cream or gel, to hold your curls in place if you want them to be more defined.
Advice on How to Curl I-Tip Hair Extensions
To avoid harming the extensions, set your curling iron or wand to a low- to medium-heat setting.
1.To prevent extensive damage to the extensions, use a heat protectant spray.
2.The microbeads holding the extensions to your natural hair shouldn’t be curled. Beads can be gently straightened out with your fingers if they accidently curl.
3.Before curling, gently brush your extensions to remove any knots or tangles with a soft bristle brush.
4.To achieve a more natural look, divide your hair into small portions and curl each one individually.
5.When curling, avoid pulling on the extensions because this might break the beads and make them lose.
6.Separate the curls to give your hair a more natural look, use a wide-toothed comb or your fingers.
7.To keep your curls in place, use a small quantity hair styling product, such as a curling cream or gel.
8.To help the curls set and last longer, wait at least 24 hours before washing your hair after curling it.
Conclusion
I-Tip hair extensions can be curled easily with the correct equipment and some fundamental hair styling abilities. You may obtain the ideal curls that will make your I-Tip hair extensions look gorgeous and natural with the right method and maintenance.
To prevent harm to the micro-beads, always use a low to medium heat setting, protect your extensions with a heat protectant spray, and curl gently. You can enjoy your I-Tip hair extensions with the ideal curls for months to come if you follow these suggestions.
Come to New Times Hair to shop for the world’s top-notch hair extensions.
https://www.newtimeshair.com/human-hair-extensions/

Leave a Reply