

When you see any symptom of hard drive failure, you have better replace the old one before losing existing data. The process is a bit more complicated, but many users like to perform on their own. That also saves your money and curtails the time of going to the repair centre. We will guide you on “how to replace laptop hard drive and reinstall operating system.” We also show the easy hacks of replacing a hard drive without reinstalling Windows.
The reason behind replacing Hard Drive
Whether you have a laptop or desktop, some reasons work as a trigger behind replacing a hard drive. Here are the reasons for replacing the hard drive.
- Due to your computer’s slow speed, you may need to install an SSD to overcome the slow speed.
- Sometimes the space of your hard drive isn’t enough to serve your demand; therefore, you need to manage more space.
- If you encounter any HDD failure signs, you have better change the faulty one before damage completely. That replacement will help to protect essential data.
Once you replace your old HDD, you may encounter a Windows operating system-related issue. This issue needs to be solved first; otherwise, your PC won’t work nicely.
When it comes to disk replacement in a laptop, the process isn’t easy compared to the desktop. In this article, we will discuss the process of how to replace a laptop hard drive and reinstall the operating system.
The process of replacing the Laptop HDD and then install the OS
The following section will discuss some basic steps of replacing the laptop hard drive and reinstalling the OS.
1. Firstly, you need to ensure proper back up your existing data.
When you wish to replace your laptop’s hard drive, you have to ensure backup of your existing files, like pictures, documents, program installation files, videos, music files, and so on.
You can take help from free or professional backup software to backup your laptop’s data. In our process, we use MiniTool ShadowMaker. You can restore and backup your folders, files, Windows OS, disk partitions with this tool. Plus, that tool will help you in file sync and disk cloning.
It doesn’t matter to download the Trial Version to protect your data. You can easily download that tool from the official website.
Step No. 1: Firstly, you need to download and then install MiniTool ShadowMaker on your laptop. After completing the installation process, you need to double-click on it to open.
Step No. 2: Interestingly, this software, by default, backs up your existing OS. But, the backup of your file need some steps to follow like
Locate Source => select Folders and Files => select which items you need to keep backup=> click on the OK.
Step No. 3: Now, enter into the Destination to select the storage path.
Attention: Your selected partition should have enough space to contain your chosen data. Notably, you have the option to choose a USB flash drive or an external hard drive.
Step 4: In this stage, your job is to commence file backup by clicking Back up Now
Once you complete your data backup process, now let’s see the main topic, like replacing the laptop hard disk drive and then reinstalling the OS.
2. The process of creating an installation USB Drive or Disc
Before reinstalling Windows OS on the laptop, your job is to create a USB flash drive or an installation disk.
You need to navigate to the website of Windows and then get the ISO file. That file needs to be downloaded based on the versions.
Once you replace your hard drive, you need to reinstall the OS. Herein you can use the Media Creation Tool. That tool will help you to make a bootable USB drive from the ISO file.
One word of caution: The USB drive should have sufficient disk space.
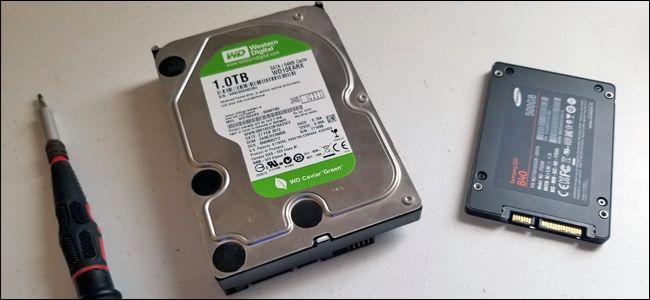
3. The process of removing the old hard disk drive
Once you complete the above steps, you need to set up a new hard disk drive.
- Firstly, you need to make sure your laptop has no power connection, so unplug it.
- Now, remove the screws to open your laptop case.
- After that, unplug the power cables and data connectors from the laptop disk.
- Typically, you will find some small screws used to attach the hard disk drive. SO, after removing those, you can remove the hard disk drive from your laptop case.
Note: The removing operation isn’t the same for all laptop brands. That’s why you need to search online or see the manual for your brand.
4. The process of installing a New Hard Disk Drive
When you are going to install the hard drive, you need to perform the opposite task that you have finished already.
- Firstly, place the new drive on the disk space and then connect the power cables and data connectors.
- Now, attach those screws with your new hard disk drive and then close your laptop case.
5. After replacing the new drive then reinstall the Windows 10
Once you replace your old hard drive, your first job will install OS on that new hard drive. In the following section, we enlist the OS reinstall process.
1: Firstly, attach the CD or DVD disc or USB drive to the laptop and then enter the BIOS menu by pressing a specific key. Now, initialize your laptop from the medium; you need to change the boot order.
2: Now, choose the time, language, keyboard, and time currency.
3: After that, a new window with the Install now icon will be visible, so click on that.
4: Now, a new window will appear, which demands Windows 10’s product key on there. You can ignore that by clicking “I don’t have a product key.”
5: Afterward, you are asked to mention the edition for which you license. So, select the appropriate one and comply with the terms of the license.
7: Now, you need to click Custom that will help you only install Windows.
8: The next task is to select the space which is unallocated (if you have no partition and display the unallocated space) => click the Next logo.
9: Finally, your new Windows OS will commence installing using the setup tool. You need to wait for some minutes until finishing the process.
6. The process of restoring Backed-up Data
Once you have finished the installation process, you need to complete the windows configuration with the on-screen command. Moreover, you will find a way to restore your backed-up files to your newly installed hard drive.
So, for restoring data, you need to connect the disk containing the data backed up. Now, install the MiniTool ShadowMaker and open it => navigate the Restore interface.
Now, your job is to select the restore version and then the files and folder that you wish to restore. Then, you need to show the path and complete the restore process. And, again install your programs and update your installed OS. Then, you need to install the adjusted privacy settings, latest drivers, etc.
That is all from us in the process of replacing the old hard disk drive and reinstalling the OS. We hope the above steps will help you replace the HDD and perform the system reinstallation,
How to replace an HDD without reinstalling Windows?
You already know that you should restore your files to a new hard disk drive when you wish to reinstall your windows. After that, install essential programs to make the laptop operational. But that process seems troublesome. That’s why the user sometimes looks for the technique to replace the hard disk drive without reinstalling programs and windows.
You can easily do that using the disk cloning system. That process will help you by transferring all data such as system settings, Windows files, applications, documents, registry, and others to the new hard drive from the old one.
Typically, the old and the new ones are the same. Therefore, you can easily connect your new hard drive to the laptop and then boot it. After that, you can run your laptop normally. In that process, you don’t need to change anything.
When you wish to clone an HDD to an SSD or other drive, you can use MiniTool ShadowMaker. This tool will help in disk cloning. Interestingly, that tool has a built-in feature named Clone Disk which will help you clone everything.
You can download and install the trial version of MiniTool ShadowMaker to clone the disk.
- Firstly, you need to open MiniTool ShadowMaker => locate the main interface.
- Now, locate the Tool tab and then the Clone Disk. After finding the Clone Disk, you need to click on that.
- After clicking on the Clone Disk, you will find the section named Source and Destination, so click on that. Now, select your new hard drive and system disk.
One word of caution: You have to ensure the new dish has no essential data because the cloning will erase all that data from the disk.
- Now, the tool starts cloning.
Note: You need to give some minutes to finish the process.
Once the cloning process finishes, you need to turn off the laptop and then remove the old HDD. Now, install your new hard disk drive and boot your laptop from the new hard disk. After that, your laptop becomes ready to use.
Final thought
Hopefully, you know the detailed process of “how to replace laptop hard drive and reinstall the operating system.” So, follow our mentioned process carefully to complete the task efficiently.
Leave a Reply